This post will take you through a step-by-step guide for the construction of a model railroad with stunning mountain scenery. Along the way, you will get specific instructions as well as optional (albeit very helpful) tips.
This particular model railroad layout is that of a 4mx2m HO layout. As you can see, the layout is still under construction. However, the baseboard, track risers, tracks, and ballast are already in place. Everything is already laid out so that you can gather plenty of tips and clever techniques that can be quite useful as you build mountain scenery.
There are plenty of materials that were used to create the mountain scenery. There’s styrene boxes, aerosol triple expanding foam, and plaster cloth. In terms of tools, the owner only had to use a carving knife and a surform.
Despite the simplicity of the methods, materials, and tools involved, the product is still a beautiful and realistic layout of mountain scenery. Read on and see for yourself.
Step 1 – Making a Box Section

First, make a box section with openings. It should have spray paint inside with flat and black water-based acrylic. If you look closely, you will notice that there is a roof for the mountain scenery to go on top.
Step 2 – Breaking up Polystyrene Boxes

Next, break up the styrene boxes and randomly place them on the tunnel roof. Use your hands to give random patterns to the edges for a realistic cave layout above the tunnel opening. Make sure to get your boxes from a large supermarket to get the best quality.
Step 3 – Triple Expanding Foam Inside Tunnel

Once that’s done, fill in everything with about 3 cans of aerosol triple expanding foam (around $14 at Home Depot). This will taper down into the base board. In this photo, notice also how the hand-broken styrene adds texture to the mountain.
Step 4 – Cured Expanding Model Railroad Mountain Foam

The expanding foam will cure for approximately 24 hours. Afterwards, carve the foam using an electric carving knife and a surform. To add to the realism, chop at the form randomly.
Step 5 – Use Surform and Carving Knife

Once shaping is done, you can cover it in plaster cloth. You may reconsider using wadded newspaper because some modelers have had insect problems. To create the mountains, rivers, and waterfalls, use a surform.
Step 6 – Harden Plaster for Layout

The cloth will harden after 24 hours. To reinforce the hardshell, create a mixture of plaster and dab it on.
Step 7 – Priming the Layout

Finally, prime the layout with a mixture of grey and acrylic primer mixed with some water and plaster.
When making the mountain scenery for your model train, make sure you take note of these steps. Remember to always create a box section first and fill it in with aerosol triple expanding foam. When you’re moulding your mountains, cut randomly with the carving knife to make it look real. As for wadded newspapers, it may be best to go with plaster cloth instead.
Although you don’t have to follow all the steps that were made to build this particular layout, most of them are still quite helpful and can save you plenty of time and prevent any problems in the process. View more tutorials.
Model Railroad Mountain Scenery Ideas
Building model railroad mountains may not be the easiest way to go about your scenery, but it sure is rewarding. These natural wonders are picturesque all on their own, so adding them to your layout is a surefire way to make it visually stunning.
There is a lot to take in consideration when building a model trains mountain design. Obviously, you’ll need enough space in your room to fit the scenery. You also have to get the right materials to make sure your scenery lasts for a long time.
Lastly, you’ll also need some inspiration. You can always rely on your imagination, of course, but seeing a few examples wouldn’t hurt. Check out some model railroad mountain scenery ideas below!
Model Train Mountain Design
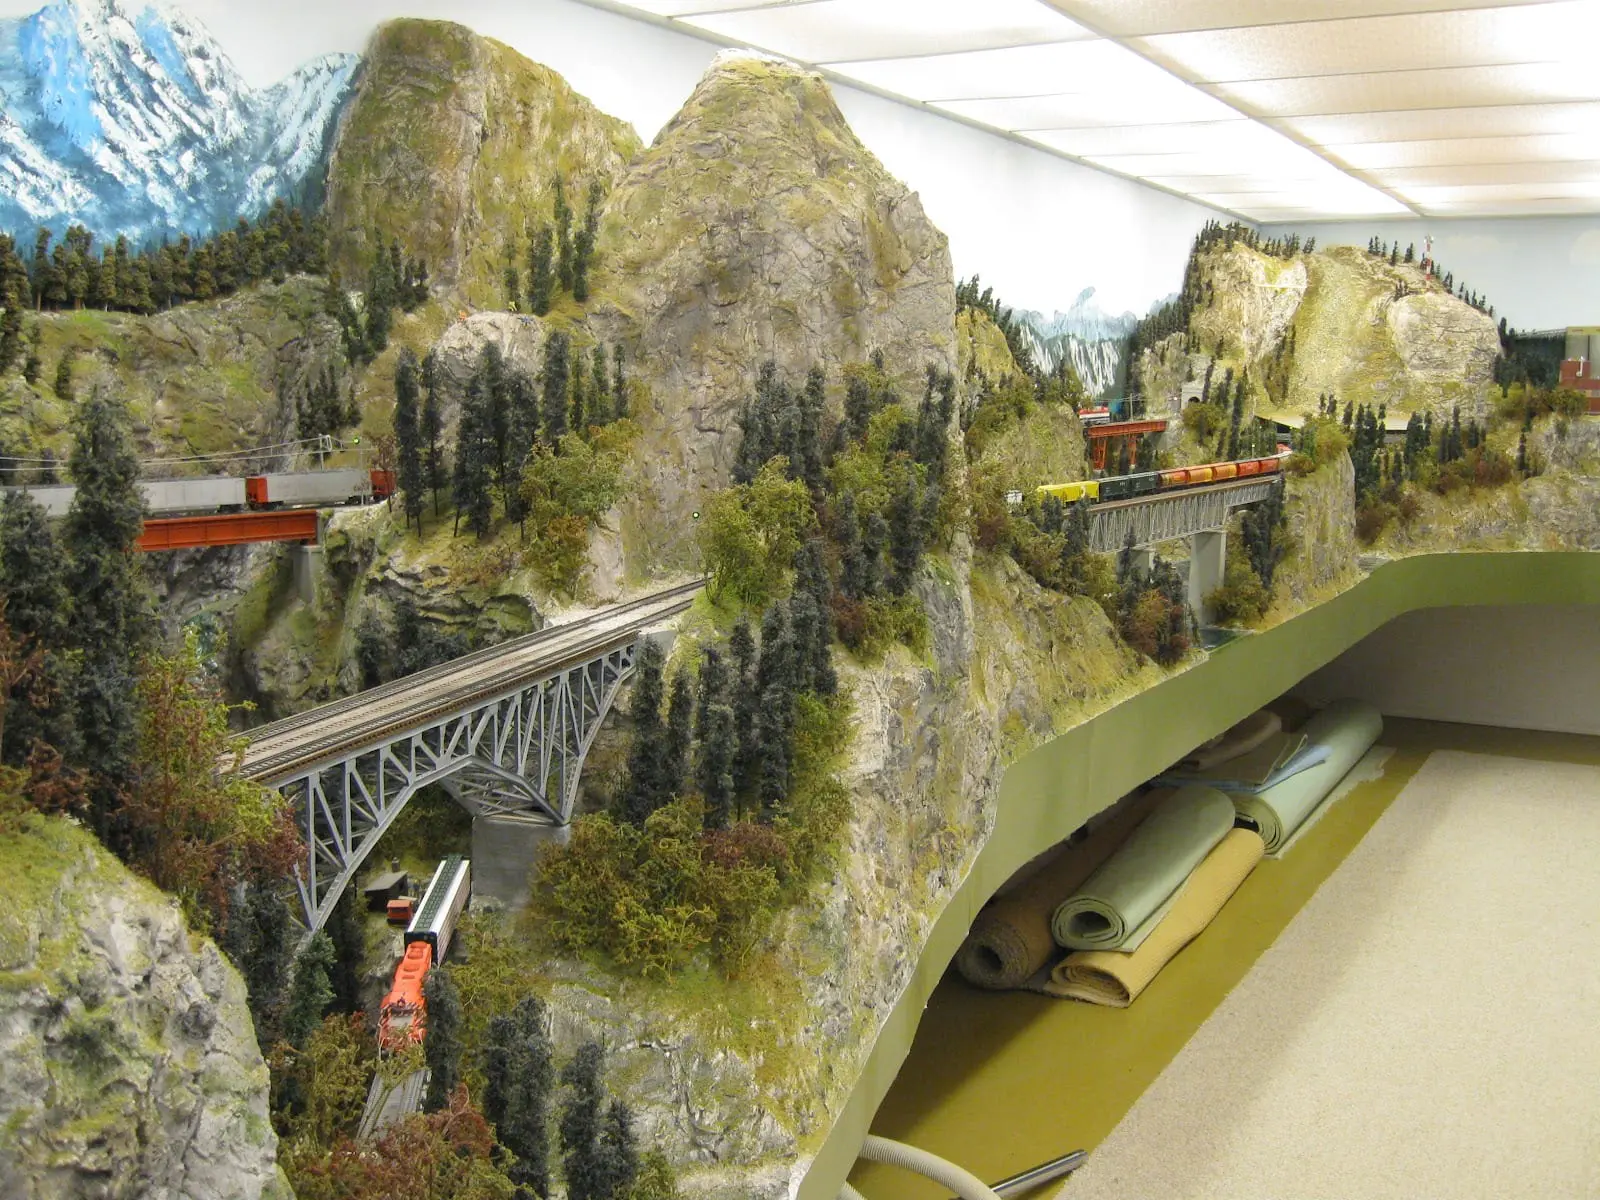
If you have the space for it, why not go all out with your model train mountain design? The model railroader of the layout above did just that by filling it with so many details. At the lower part of the mountain, you can see a tunnel where the model trains can enter. Scattered about are various trees and other greenery.
Mountains for train sets often become the center of attention, so it’s best to make them as beautiful as possible. Aside from that, there are also structures like police stations and a depot to bring the layout to life. Trains of different colors are also present to give it a lively feel.
Massive Model Mountain Bluffs
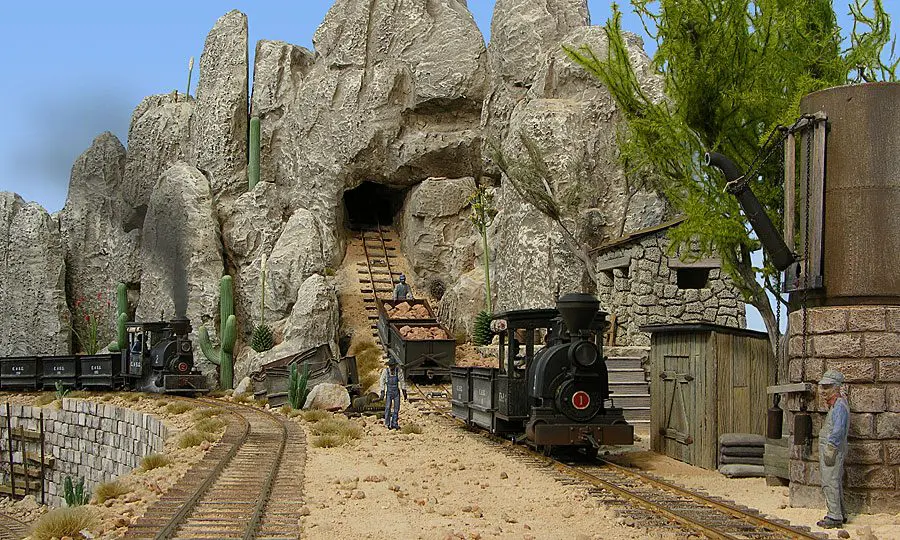
HO Scale Model Train Mountain
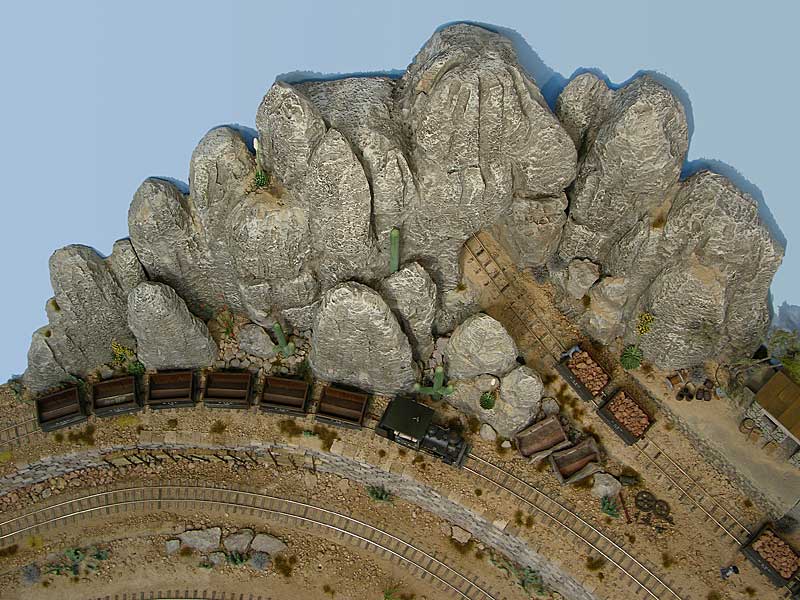
Here is a look at the previous bluff, but from a different perspective. Notice how it looks smaller from this angle. This is because the model bluff was strategically placed at the corner of the room to save space. At the same time, it doesn’t look cramped at all, especially when looking at it from a lower angle. Take note of this because it is a great tip on how to take full advantage of the space you have.
Difference between Bluffs vs. Mountains
To put it simply, mountains are far larger compared to bluffs. Mountains tend to rise above every other landform in its surroundings. Bluffs, on the other hand, are found next to mountains overlooking bodies of water.
With that said, it’s important to differentiate them from each other especially if you have both in one layout. It always depends on the size of your layout and the other elements around it. It may be hard at first, but once you get used to it, you’ll be able to estimate the correct size for your bluffs and mountains accurately.