In this article you learn how to install feeder wires on model railroad tracks for smoother running model trains and ability to move your trains at varying speeds.
Good electrical connections are the key to a smooth running model train railroad. One way to achieve this is with feeder wires. There are several different options for feeder wires as discussed below:
Feeder Wire Options:
- Using a Rail joiner that is connected to a piece of wire. Though they are handy they kind of limit where you can put your feeder wire to where the joints are to the rail and they can also get a bit expensive quickly.
- A cheaper alternative to rail joiners is to learn how to solder and drop your own feeder wires by using actual solid wire.
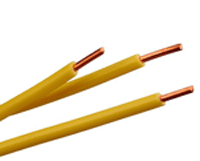 If you have a section of track from where you want to add a couple feeder wires to use 22 gauge solid wire that can be found at RadioShack or any warehouse that specializes in electronic supplies. Remember, before attaching the wire to the rails, you first need to tin it.
For stripping the wire you expose the bare section of the wire and place this part of the wire in the smooth part of needle nose pliers while bending it at a right angle and squish down a bit. By doing this, it will give you a flat spot on the wire to attach to the web of the rail. Next you bring in the clamp that will hold the wire in place, while you tin it but make sure the clamp is holding the wire snug.
To prepare the wire for tinning, first dabble the end of the wire with a bit of flux. The flux causes any impurities on the wire to burn off when the solder is attached. Next use a soldering iron (40-65 watt soldering iron with a pencil tip is good for most model railroad tasks) and solder it.
 With the feeder tinned, you will then tin the section of rail where the feeder wire is going to be attached using the same technique as described above.
First put a dot of flex on the outside web of the rail then tin the rail and the feeder. With the feeder and rail tinned, put the feeder wire into the spout of where the solder is and touch it with soldering iron until the joint is solid.
Once the wires are attached, you can run them through the cork to the plywood on the underside of the layout and then they can be attached to the bus wires, which are insulation displacement suitcase connectors.
Useful Tips:
Tip: Soldering is a skill that should be practiced on a scrap piece of track before doing it on your actual model train layout.
Tip: Remember not to put the iron on the track for too long otherwise you will risk melting the plastic ties and ruin the model railroad track.
Tip: Feeder wires are a great way to ensure electrical reliability on your model railroad.
Tip: Flux comes in both paste and liquid forms. You can purchase it from RadioShack or any electronic supply store.
Here’s How to Get Started Quickly And Easily With Your Dream Model Railroad
Also, please add comment below if you have any other suggestions or questions about installing feeder wires on railroad track.