Choosing your ballast
You can choose your ballast for model train layouts from any local hobby shop or online. There are many sizes and colors ballast is available for purchase.
Take you size and color which is appropriate for your scale, locale. Many model train layouts use the rocks in the local area as ballast. It’s important to know what color ballast is perfect for your model train layouts. This won’t matter much if you are a freelancer, you can just pick any color for your model train layouts which looks good with the rest of your scenery.
If there are not any prefer the color of your own, you can mix different color together. Then you will get a beautiful shade for your model train layouts. When you do your experiment, do this for the small amount.
Example: 1 teaspoon of color A mixed with 1 teaspoon of color B. Look the mixture color and think is the color you are looking for! If your answer is yes, then make a large amount in the same proportion to use on your model train layouts.
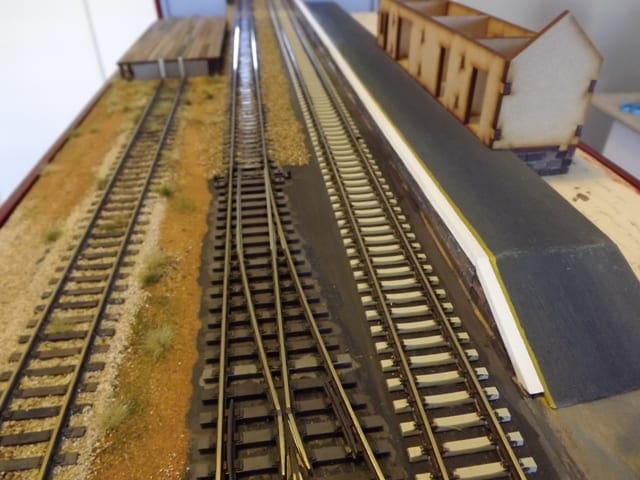
You may want to vary the shade of model train layouts ballasts in the different area of your model train layouts. Such as you may want a darker shade around freight yards or engine servicing areas than you would on the mainline between towns. My suggestion doesn’t use too many different shades or colors on the same layout. I don’t do this.
Technique for applying model train layouts ballast
I think you have finished fixing your model train layouts and painting, now you ready for ballasting.
There are different techniques for making model train layouts ballast. Here I will describe the best one.
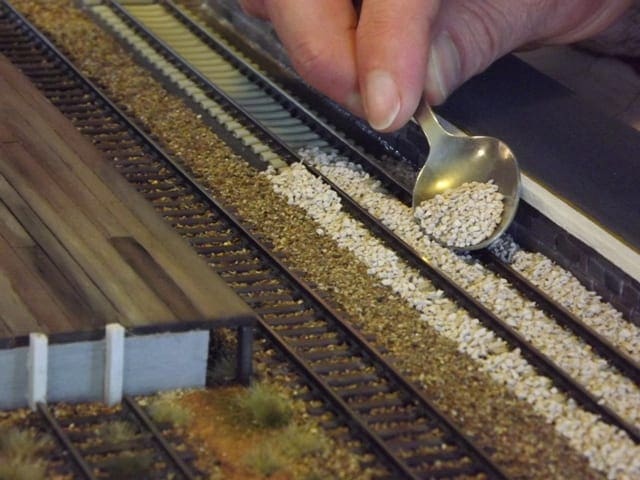
Use a little teaspoon to carry a little quantity of dry ballast directly over the track and gently faucet the other fringe of the spoon along with your finger with the spoon inclined so the ballast sprinkles out of the spoon to a small degree at a time. add tiny sections of track initially. Sprinkle the ballast over the within of the rails initial, then over the surface of the rails. the surface edges of the ballast ought to be neat and straight. once you have got wet the ballast on a vicinity of the track with the spoon, take a medium or soft brush to unfold the ballast in and around the times each on the within of the rails and out. Again, keeping the surface edges neat and straight. Ideally, none of the ballast ought to air high of the rails, simply in between them. This can be troublesome to try to with N or Z scale, however, do the most effective you’ll be able to.
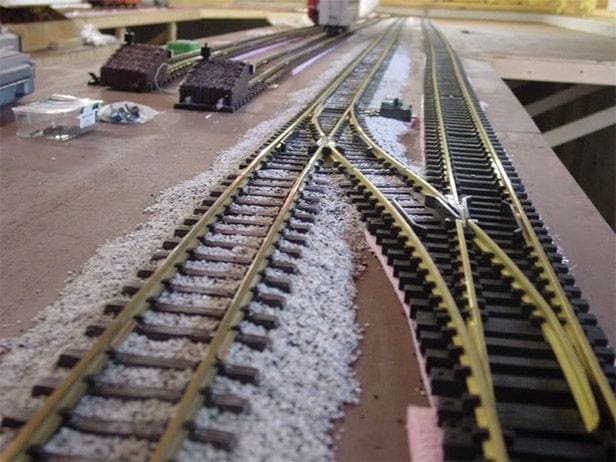
Now your job is on next step. Do the same as you done before. Try to avoid getting ballast around the points of turnouts. If this occurs, keep vacuum the ballast out of the area. You have groomed and put down the ballast on a few feet of track. Now you are ready to glue it down.
Make a mixture of 1 part white glue to 4parts water and 1 part alcohol. If you have got antecedently painted your track ties, check a tiny low space of the painted track with alcohol to form positive the paint does not dissolve and run everywhere the ballast. If it does, then use a couple of drops of detergent in your diluted glue instead of alcohol to form it “wetter” therefore it flows into the ballast and beneath the track well.
Use a measuring instrument to draw up the glue mixture then hold the tip of the measuring instrument near the middle of the track between the rails. Gently drip the glue mixture onto the ballast and permit the glue to run into the ballast slowly. Still, drip the glue in till you see the white glue saturating the ballast however not enough to cause pooling. The glue ought to run and wick its resolution from the middle to the surface of the rails from beneath. You’ve side enough once you see the ballast on the surface of the rails become saturated with the white glue. You’ll be able to then continue identical method on future sections of track. If the ballast gets accidentally affected from wherever you placed it, use the comb or your finger to maneuver it back in situ.
Dry this overnight. The white glue will not be visible and the ballast should be firmly glued in place. Check the track carefully. You should be sure that none of the model train layouts ballast has been glued to the inside of the rails. Also, check your turnouts to take care they still work. Clean off any glue that will have dried on the insides or super of the rails.

Here’s How to Choosing the Right Scale with Limited Space
Resources: