A well built tunnel is one of the highest payoff details you can add to a model railroad. The moment a train disappears into a hillside and reappears at the other end, the layout feels real in a way a flat oval never does. The hard part is that a tunnel is actually three separate builds: the two portals at the entrances, the body of the mountain above, and the inside walls and ceiling that show every time a train sits in the opening.
This guide walks through all three. You can get a usable tunnel built in a weekend with materials that cost under twenty dollars, or you can spend weeks on a hand carved stone showpiece. Either approach works as long as you handle clearances correctly and finish the inside as carefully as the outside. If you want context on the larger scene around the tunnel before you start, our walkthroughs on building model railroad mountains, doing rock painting for the layout foundation, and the basics of model railroad scenery are worth reading first.
What You Need Before You Start
You do not need specialty tools to build a tunnel. Most of what is below is in a typical hobby drawer. Gather everything in one place before you start cutting so you do not have to break momentum mid build.
- Tunnel portals (either cast plaster forms from a hobby shop or hand cut from Styrofoam or basswood)
- Beaded Styrofoam in 1/2 inch sheets for hand cut portals and the tunnel body
- Plaster cloth for shaping the mountain over the tunnel
- Wadded newspaper as a quick lightweight form under the plaster cloth
- Expanding foam (one disposable can) if you want the fastest possible mountain build
- Cardstock or construction paper in black, brown, or gray for the inside walls
- Acrylic paints in concrete gray, black, and dark gray for portal weathering
- Sharp hobby knife, hot wire foam cutter, and a cheap toothed kitchen knife for shaping
Step 1: How to Build the Model Railroad Tunnel Portal
The portal is the part of the tunnel everyone sees first, so it gets the most attention. You have two paths here. Buy a pre cast plaster portal at any decent hobby shop in the style you want, or hand cut your own from beaded Styrofoam.
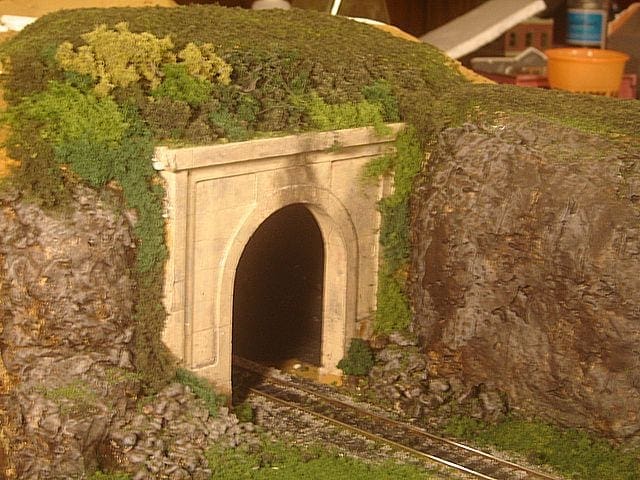
Cast plaster portals come in wood plank, cut stone, random stone, brick, and rough concrete finishes. They are inexpensive (typically five to ten dollars each), already to scale, and ready to paint. For most builders this is the right starting point. The portal in the photo above is a cast plaster single track in cut stone, set into a moss covered hillside with weathered concrete tones brushed over the base color.
If you want a hand cut portal, take a half inch thick sheet of beaded Styrofoam and trace the portal shape on it with a marker. Cut it out with a sharp hobby knife. You can also use thin strips of basswood to build a wooden portal in layers if you want a timber framed look. Either way, the cut comes first and the paint comes after the portal is mounted.
Clearance Check Before You Glue Anything Down
Before you glue the portal in place, push your tallest piece of rolling stock through the opening. Double stacks, auto racks, and tall steam engines with high stacks all have higher clearance needs than a basic boxcar. If anything scrapes the top of the portal, enlarge the opening now. Fixing this after the mountain is built means tearing the whole scene out.

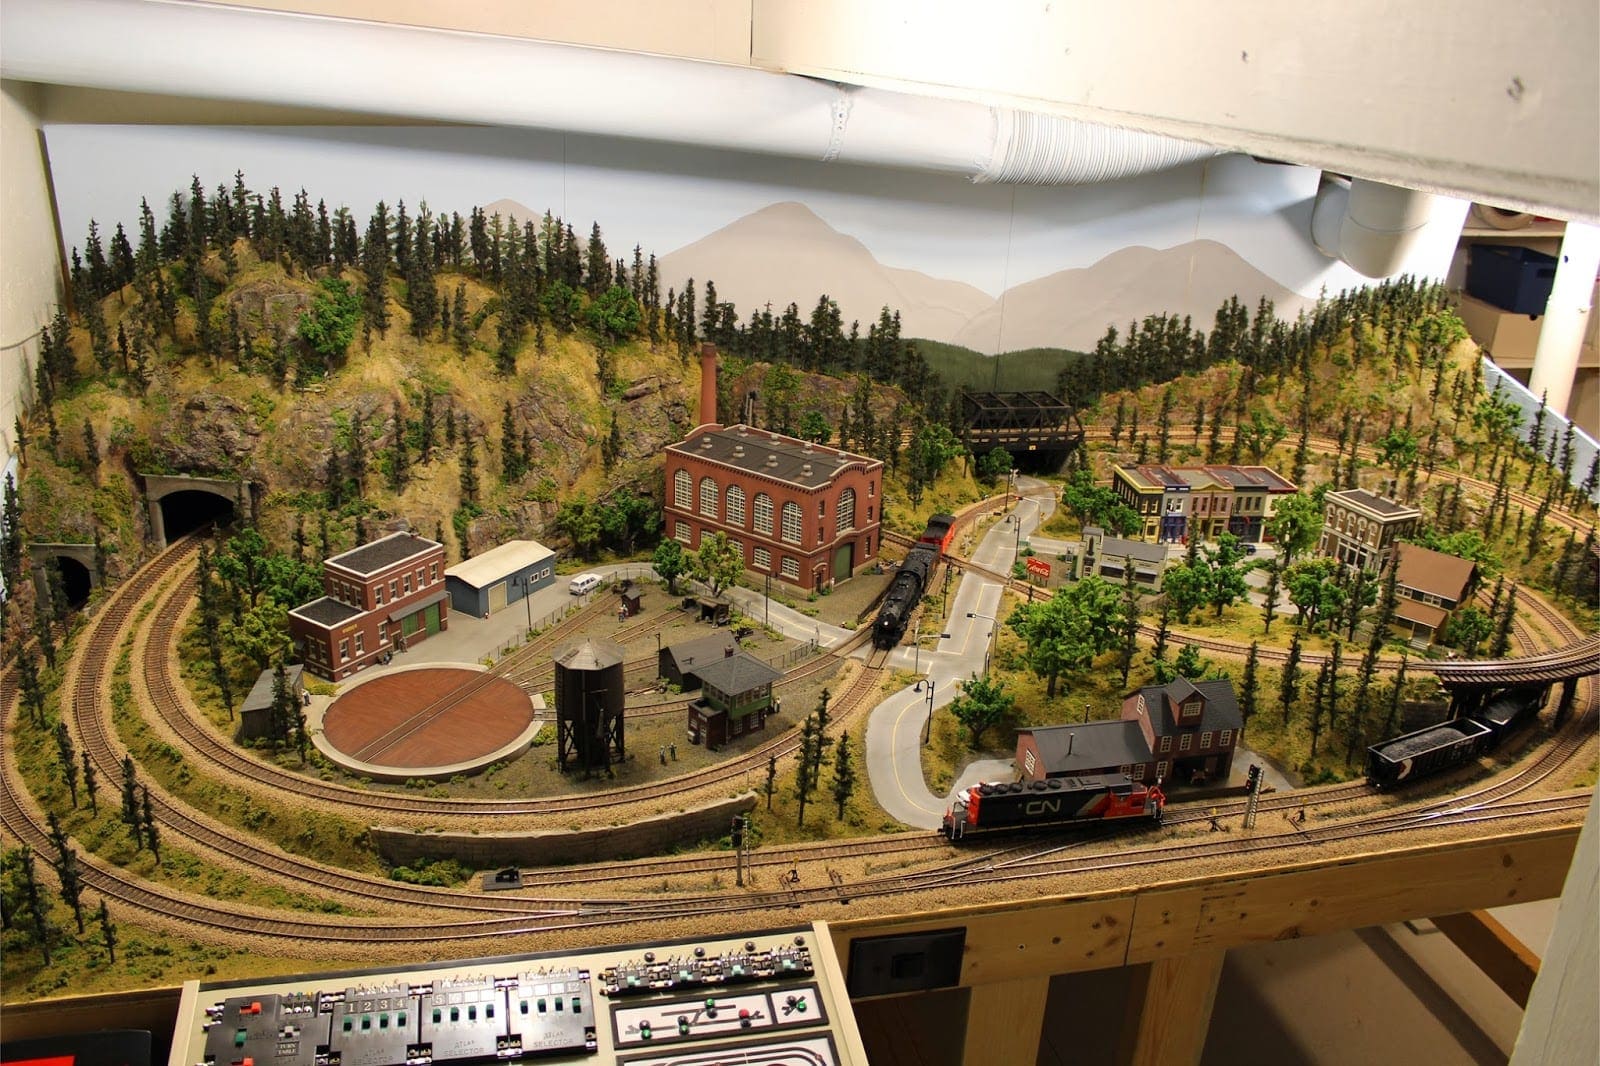
This is a double track portal with a cut stone keystone in light gray. The matching retaining wall to the right of the portal is what sells the scene. Adding a short wing wall or retaining wall on either side of a portal turns it from a freestanding piece into something that looks engineered into the hillside.
Painting and Weathering the Portal
Start with a base coat of concrete gray. Once that dries, dry brush a lighter gray over the raised edges to bring out the texture. Then mix a dark gray wash (mostly water with a few drops of paint) and let it run into the cracks and joints. Finish by brushing a darker stain of gray or black across the top of the portal where soot from passing locomotives would actually settle.
Step 2: How to Make the Model Train Tunnel Body
The body of the tunnel is the mountain above and around the portals. It needs to be light, solid enough to hold its shape, and removable enough that you can reach in and clean track when you need to. There are three reliable ways to build it.
Method 1: Styrofoam Walls and Roof
Cut a strip of Styrofoam tall enough to form the walls of the tunnel on each side of the track. Curve them to follow the track if needed. Cut another piece to cover the top, forming a roof box. Then wad up newspaper and build it into a mountain shape over the Styrofoam, and cover the whole pile with plaster cloth.
This method gives you the most control over the inside shape. The walls are flat, so if you want to add rock castings or paint the interior cleanly later, this is the easiest base to work with.
Method 2: Expanding Foam Over a Newspaper Form
Cover the track directly with wadded newspaper, then wrap the whole pile with cling wrap or cellophane. Spray expanding foam from a can over the cellophane covered newspaper, leaving the portal openings clear at each end. Let the foam cure overnight without touching it.
Once the foam is hard, reach in through the portal openings and pull the newspaper wads out. The cellophane stops the newspaper from sticking to the foam. From there, use a kitchen knife or hot wire cutter to shape the outer mountain, then add a layer of plaster or texture paste for paint.
Method 3: Cardboard Web Under Plaster Cloth
Cut cardboard strips and hot glue them into a lattice over the track, forming the sides and rough top shape of the tunnel. Cover the lattice with wadded newspaper, then drape plaster cloth across the whole thing. This is the traditional model railroad club method. It is the cheapest and the lightest, but the inside ends up rougher than the foam wall method.
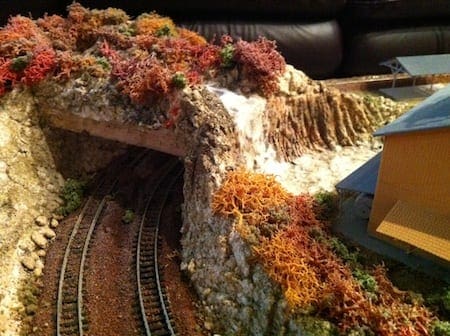
The portal above is a rough rock style built with method three, then weathered with orange and yellow lichen scenic foliage planted along the top. The tunnel mouth is intentionally irregular to look like it was bored through natural rock rather than poured from a single mold.
Make the Top Section Removable
Whichever method you use, build the top half of the mountain so you can lift it off. Track inside a tunnel collects dust, rolling stock derails, and a stalled locomotive in the middle of a tunnel that is glued shut is a disaster. A removable top section turns a 30 minute fix into a 30 second fix.
Step 3: Finishing the Inside of the Tunnel
This is the step most builders skip and most viewers notice. The inside of a tunnel is visible every time a train sits at the portal, every time you take a low angle photo, and every time a visitor crouches down to peek inside. A raw plaster ceiling and bare benchwork ruin the illusion.
The cheapest fix is also the most effective. Cut a piece of black, brown, or gray cardstock or construction paper to fit the inside of the tunnel. Roll it up loosely, slide it into one end of the tunnel, and let it unroll against the inside walls and ceiling. The cardstock follows the curve of the tunnel and gives you a clean dark surface to look at instead of the rough underside of the plaster.
The tunnel in the photo above uses a brick patterned cardstock liner with the brick arch printed on it, which is one step up from plain cardstock. You can buy printed sheets from any hobby retailer or print your own if you have access to a color printer and texture files.
Adding Rock Castings or Sculptamold to the Inside
If you want the inside to look like raw stone rather than smooth concrete or brick, you can press rock castings against the inside walls before they cure, or smear Sculptamold along the walls and paint it with the same washes you would use for outdoor rocks. This is more work but it ties the inside to the outside scenery in a way that looks intentional.
Either way, finish a few inches deep into the tunnel from each portal. Detail past that point is wasted because nothing can see it.
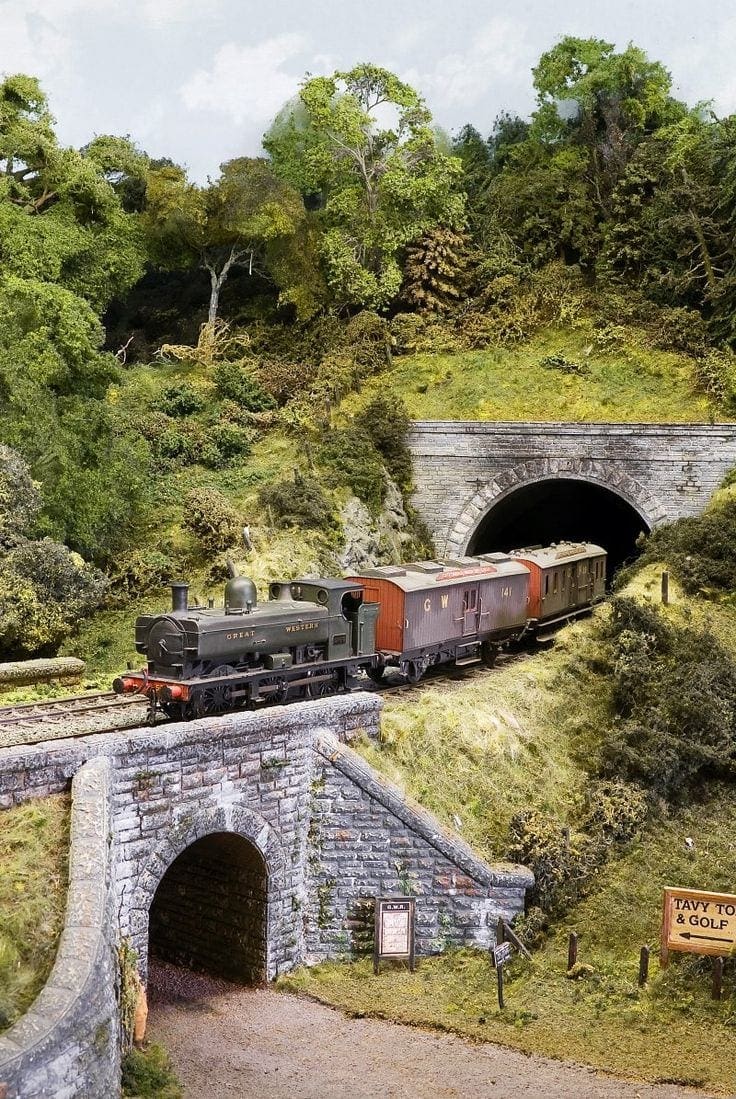
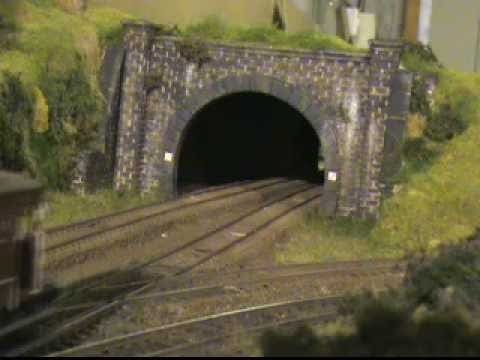
A British style stone twin portal layout like the one above shows what happens when the inside detail matches the outside. The green tank engine emerging from the upper tunnel reads as a real train coming out of a real mountain, not a toy popping out of a hole. The dense scenic foliage above the portal helps, but the matching stonework on the inside is what closes the loop.
Key Techniques That Separate a Good Tunnel from a Forgettable One
Most tunnels fail in one of four predictable ways. If you handle these correctly, your tunnel will look intentional whether you spent twenty dollars or two hundred.
Clearance Comes Before Everything Else
Test fit your tallest rolling stock through the portal before you commit to the position. NMRA standard HO double track tunnel clearance is roughly 4.5 inches high, but specialty cars like double stacks and auto racks push that. Measure your fleet, not just the manual.
Match the Portal Material to the Surrounding Scenery
A polished cut stone portal looks wrong on a rough mountain layout. A rough rock portal looks wrong on a clean industrial mainline. Pick the portal style based on what is around it. The portal needs to look like it belongs to the same railroad as the rest of the layout.
Always Make the Top Removable
Every working model railroader has a story about cleaning a stalled locomotive out of a glued shut tunnel with a coat hanger. Build the lid off from day one.
Finish the First Six Inches Inside Each End
Cardstock, brick paper, rock castings, or Sculptamold. Pick one, install it before the mountain goes on, and the tunnel will read as real every time a train sits in the portal.
Getting the First Tunnel Built
Start with a single track section on a section of layout you can reach into easily. Use a cast plaster portal, the expanding foam method for the body, and plain black cardstock for the inside. Build it in one weekend, run a train through it, and learn what you would do differently on the second tunnel.
The second tunnel is always significantly better than the first, and that learning is hard to do without actually building the first one. The five dollar portal and the can of foam are not the bottleneck. Getting started is.