This tells you everything you need to know to make rocks for your model train layout. Here, the rocks were made with styrofoam, hygienic paper, and glue. It took a few days for it to harden and become stable. For paint, acrylic paint was used as well as the Environment Learning Kit from Woodland.
It’s only a bare layout with the tracks on the rocks, but you will certainly see how realistic rocks can be with the process detailed from start to finish.
Styrofoam for Rocks of the Train Tracks
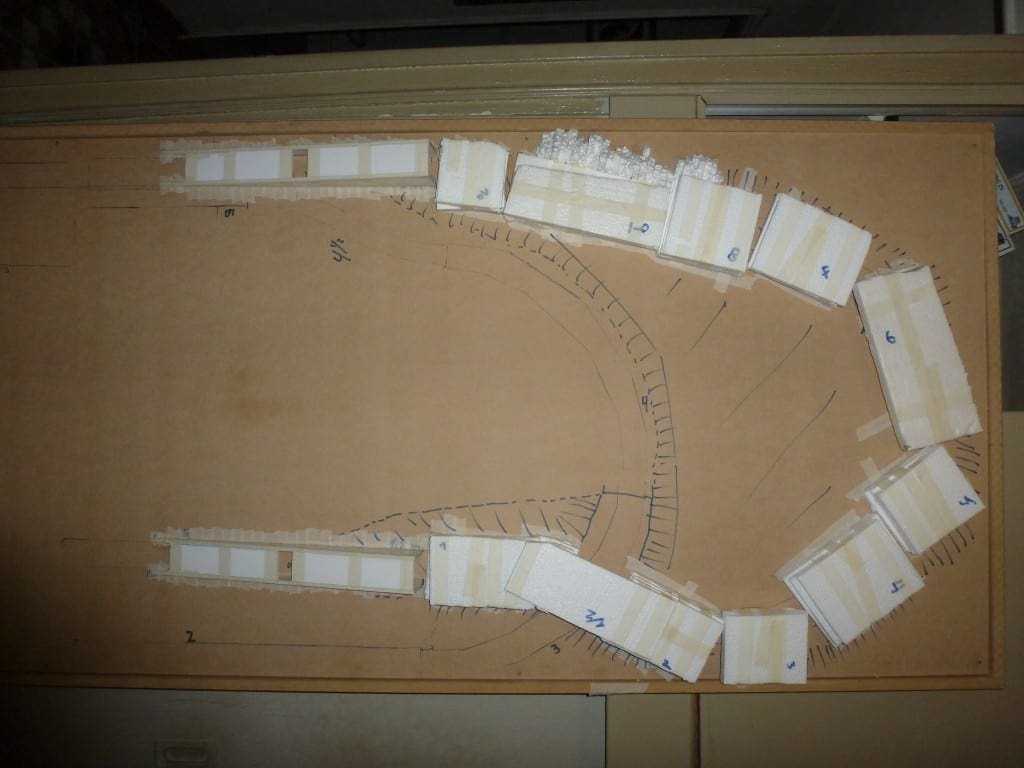
Styrofoam is used to create the rocks on which the tracks will be placed on. They’re held down with tape and are arranged to form the path of the model train. The Styrofoam makes for steady material to give the train safe passage.
Train Tracks on the Styrofoam
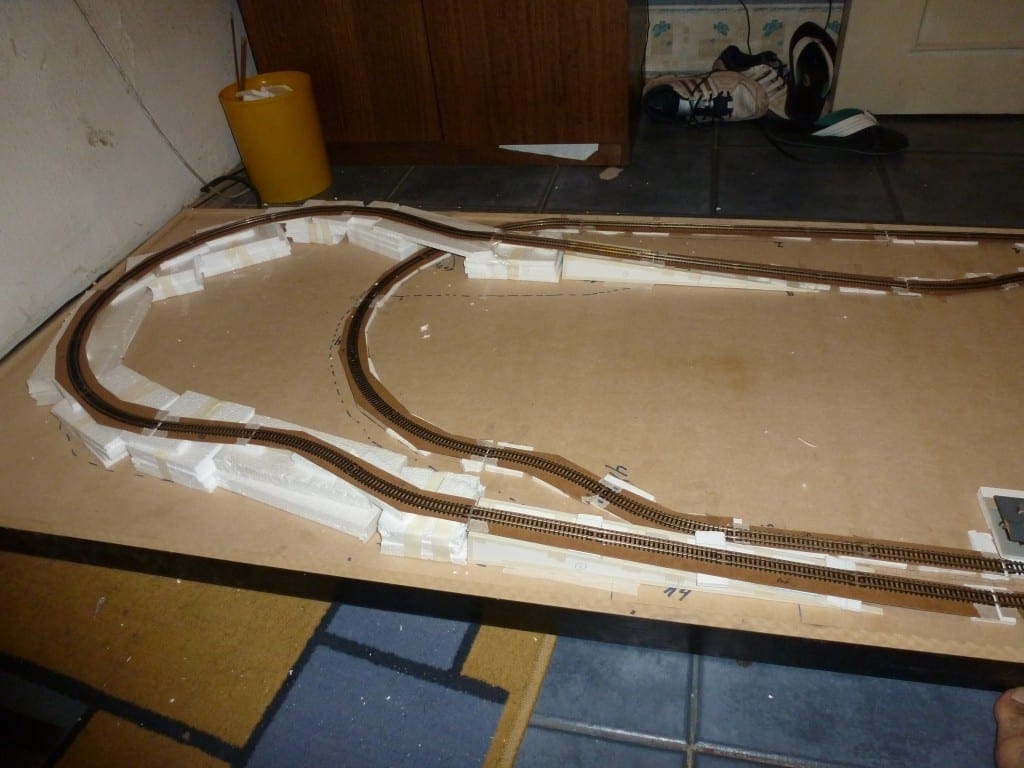
Train tracks with strips of cardboard have been added on top of the Styrofoam. From this image, you can already see how the blocks of Styrofoam will keep the tracks in place as the train passes through.
Cliffs on the Track’s Sides
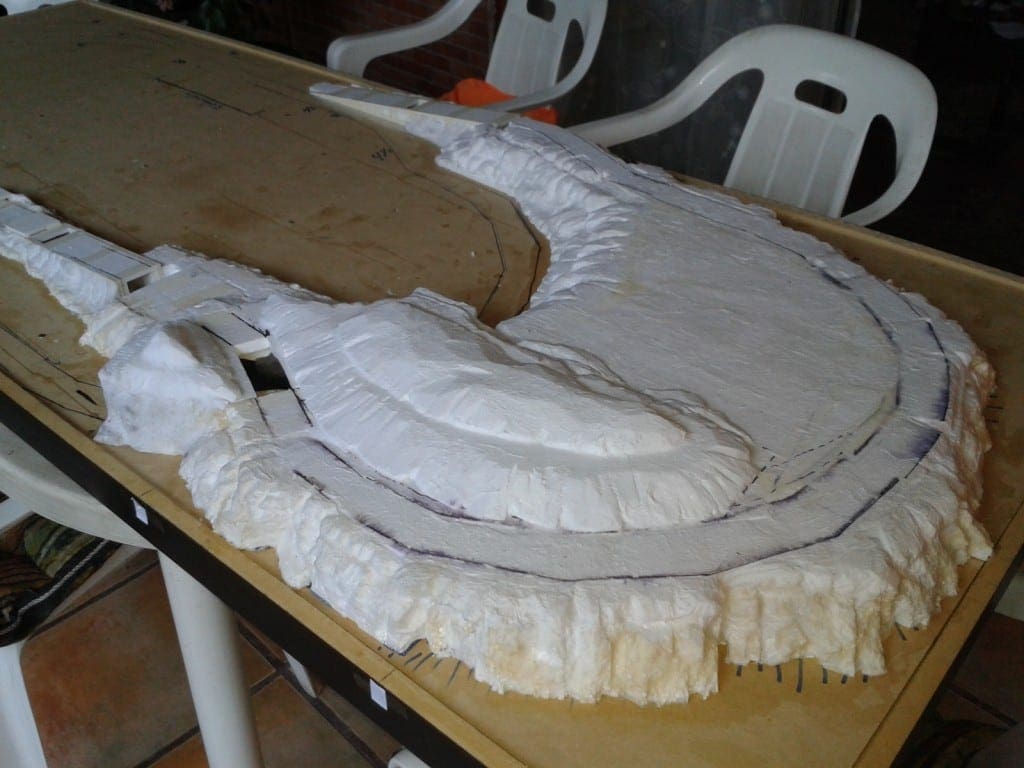
To hide the Styrofoam underneath, the cliffs on the sides of the train tracks have been molded. With hygienic paper, glue, and water, the uneven edges are already formed.
Cliffs on the Track’s Sides with Paint

The cliffs come alive with the paint. The brown edges of it are much darker on the sides than they are on the top. This attention to detail makes the scene very realistic.
Tunnel Inside the Cliffs
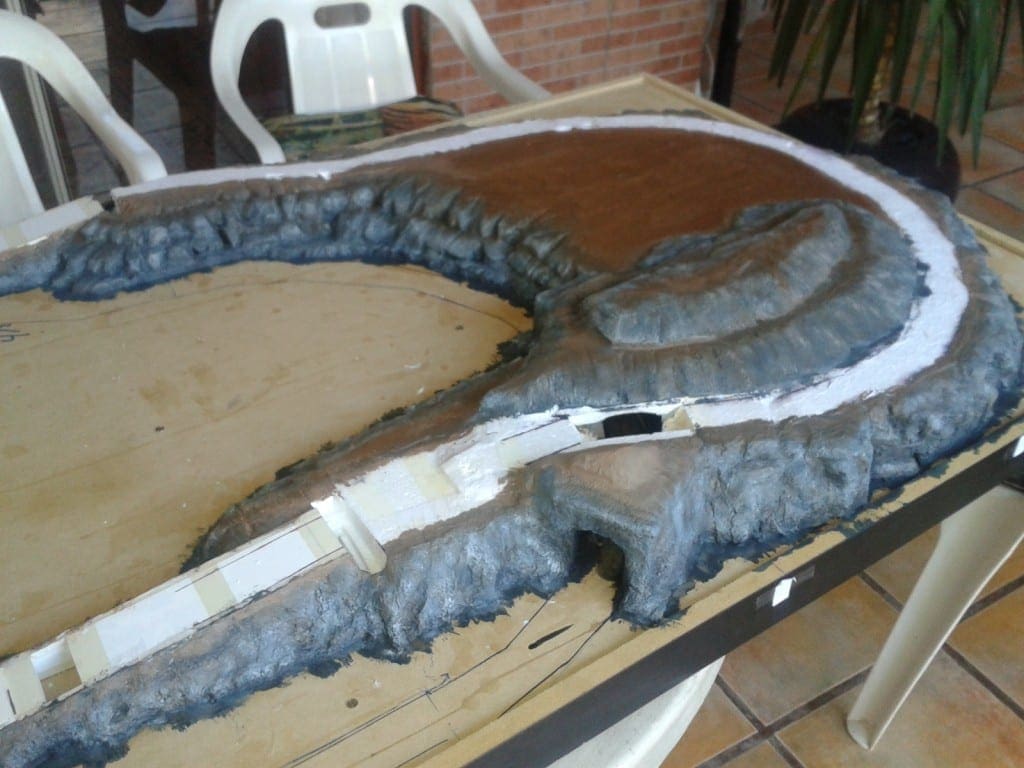
With different lighting, we can see the rocks and the cliffs much more clearly. The path of the tracks is yet to be painted, but we can already easily imagine what the end result will look like. At the lower right hand corner, we can see a tunnel that will lead within the cliffs.